Nothing like a deadline to light a fire under me! The Girls are getting together this weekend so it's the perfect time to finally deliver the quilts to Betty and Audrey.
A while back I had made a promise to myself to get the labels on four quilts I had finished. As luck would have it I didn't have Audrey's quilt available at the time. I had dropped it off, with a few others, to a friend to have some pictures taken. Well, I finally retrieved all the quilts about a month ago but didn't get the label on Audrey's until last night.
What is it with me and labels? First I can't decide what to write on the label; too much is just ugly and not enough seems pointless. I started out with this one for Audrey but it just sat there like a big old blob. The lettering looks like a 6 year old did it. I stared at it for two weeks while I worked on the Blue and Cream project but never sewed it on. Do you have troubles like this with labels?
The night before last I pulled out the box of scraps from the "Quilts for The Girls" project. Dug out the pieces from Audrey's quilt and made a block for the label. I like this one much better! It's all sewn down and ready to go. Can't wait to see if they like them!!!
Be sure to check in next week when I'll have pictures of the girls with their quilts.
Thursday, October 27, 2011
Saturday, October 22, 2011
Blue and Cream - Decisions Decisions
I've been hard at work on the Blue and Cream quilt project. It has turned into a study in organizational skills. I wish I could say I invented these organizational solutions but I didn't. Most of them I learned in classes or from my sister or from tutorials on the Internet. Keep reading, you might find one or two you haven't seen.
Before I could cut all the pieces I had to decide which blue fabrics to use for which stars. This wasn't too hard since I had to go with the quantities I had of each print. The pattern called for 9 stars of one fabric so I had to use the blue and green floral since I had a half yard of it and only fat quarters of the rest. I started by cutting the star centers. I placed the nine floral centers on the design wall as shown in the pattern layout in the book. Then I just started laying the other centers out and moving them around until I got them where I liked them.
As I started cutting the blues for the sashing, which become the star points, it was obvious I'd need to stay organized. Notice I have the magazine open to the page with the pattern on it. That magazine has never been more than arms reach away as I worked on this project.
Over 200 (2") squares, 96 (3") squares, and 25 (3 1/2") squares. That's a lot of squares and a lot of blue! Fortunately, I have these clear plastic plates that I use for keeping all the parts and pieces in their rightful places. I'm not sure where I got these plates, probably from my sister ;-) I swear I use these plates for every project now.
Two more of my favorite tools are a fabric guide and yellow sticky notes. The chart helped me keep all the color decisions organized. The sticky notes keep all the plates organized by size and location such as "2 inch squares for sashing". How did the world operate before sticky notes?!
I thought once I'd picked the pattern and the fabrics all the decisions for this quilt were done but not quite. Knowing that this quilt is a gift I was keenly aware of the recipients tastes, or what I believe her taste to be anyway. The pattern I chose shows stars that are "scrappy". The centers are one fabric and all the points are a different fabric as seen here.
A fun look but I just didn't see it as something she would like. Or is it just me struggling with scrappy? Either way scrappy stars were out! Instead I used all the same color for the stars and I think it was the right way to go. Here's an audition for a star. It's hard to see the cream colored background against the white design wall but you'll see it later on.
Now normally I would take the cut pieces and arrange them in piles in the order they should be sewn together. That way I can just chain piece them and whip out the blocks in no time. With this quilt the blocks are actually the sashing around the fussy cuts and the star centers.
To create the sashing I started with the smallest pieces to create the flying geese blocks. I used plenty of starch before stitching. Then pressed toward the blue prints so the seams wouldn't show under the cream pieces. Chain piecing worked for these but the next piece blocks were different.
The larger blocks, which kind of look like rectangular snowball blocks. More starch and more gentle pressing.
I ended up with a bunch of sashing blocks. Kind of looks like a puzzle doesn't it? Take a look at the colors on the corners, they're different right? That's because one side is going to be the points on one star center and the other side is going to be the points on a different star center. Even if I was doing this as a "scrappy" star I'd still have to pay attention to this to make the pattern look right.
When you put one of the stars together you get this. Simple enough?
Notice in the next picture that, in order to create a star, the sashing between the two rows is laid out vertically and the sashing between the two columns is laid out horizontally. Not only do I need to keep the right color points on the right color star centers but then there were all those cream rectangles to add to the outside edges. It took me a few minutes to figure out but here's what it looked like on my cutting table. The open spaces are where the fussy cuts go. Can't show you those yet. ;o)
This is when I decided I needed to put them all on the design wall to keep it all in order! I laid all the pieces for the entire quilt on the design wall and pinned each piece in place - what a life saver! Now I'm ready to start sewing.
I'm afraid that's all the assembly I can show you until I deliver the finished quilt. I still need to pick out the borders and the backing.
Did you come across any organizational tips you hadn't seen before? Leave me a comment if you've got other ways to accomplish these same things.
Before I could cut all the pieces I had to decide which blue fabrics to use for which stars. This wasn't too hard since I had to go with the quantities I had of each print. The pattern called for 9 stars of one fabric so I had to use the blue and green floral since I had a half yard of it and only fat quarters of the rest. I started by cutting the star centers. I placed the nine floral centers on the design wall as shown in the pattern layout in the book. Then I just started laying the other centers out and moving them around until I got them where I liked them.
As I started cutting the blues for the sashing, which become the star points, it was obvious I'd need to stay organized. Notice I have the magazine open to the page with the pattern on it. That magazine has never been more than arms reach away as I worked on this project.
Over 200 (2") squares, 96 (3") squares, and 25 (3 1/2") squares. That's a lot of squares and a lot of blue! Fortunately, I have these clear plastic plates that I use for keeping all the parts and pieces in their rightful places. I'm not sure where I got these plates, probably from my sister ;-) I swear I use these plates for every project now.
I first saw a similar solution in a class I took with Charlene at The Golden Gese Quilt Shop in Concord, NH. It was a scrappy quilt and I was having a hard time wrapping my head around it. Charlene to the rescue! She gave us paper plates to organize our 9-patch blocks that had a fussy cut in the center.
Two more of my favorite tools are a fabric guide and yellow sticky notes. The chart helped me keep all the color decisions organized. The sticky notes keep all the plates organized by size and location such as "2 inch squares for sashing". How did the world operate before sticky notes?!
I thought once I'd picked the pattern and the fabrics all the decisions for this quilt were done but not quite. Knowing that this quilt is a gift I was keenly aware of the recipients tastes, or what I believe her taste to be anyway. The pattern I chose shows stars that are "scrappy". The centers are one fabric and all the points are a different fabric as seen here.
A fun look but I just didn't see it as something she would like. Or is it just me struggling with scrappy? Either way scrappy stars were out! Instead I used all the same color for the stars and I think it was the right way to go. Here's an audition for a star. It's hard to see the cream colored background against the white design wall but you'll see it later on.
Now normally I would take the cut pieces and arrange them in piles in the order they should be sewn together. That way I can just chain piece them and whip out the blocks in no time. With this quilt the blocks are actually the sashing around the fussy cuts and the star centers.
To create the sashing I started with the smallest pieces to create the flying geese blocks. I used plenty of starch before stitching. Then pressed toward the blue prints so the seams wouldn't show under the cream pieces. Chain piecing worked for these but the next piece blocks were different.
The larger blocks, which kind of look like rectangular snowball blocks. More starch and more gentle pressing.
I ended up with a bunch of sashing blocks. Kind of looks like a puzzle doesn't it? Take a look at the colors on the corners, they're different right? That's because one side is going to be the points on one star center and the other side is going to be the points on a different star center. Even if I was doing this as a "scrappy" star I'd still have to pay attention to this to make the pattern look right.
When you put one of the stars together you get this. Simple enough?
Notice in the next picture that, in order to create a star, the sashing between the two rows is laid out vertically and the sashing between the two columns is laid out horizontally. Not only do I need to keep the right color points on the right color star centers but then there were all those cream rectangles to add to the outside edges. It took me a few minutes to figure out but here's what it looked like on my cutting table. The open spaces are where the fussy cuts go. Can't show you those yet. ;o)
This is when I decided I needed to put them all on the design wall to keep it all in order! I laid all the pieces for the entire quilt on the design wall and pinned each piece in place - what a life saver! Now I'm ready to start sewing.
I'm afraid that's all the assembly I can show you until I deliver the finished quilt. I still need to pick out the borders and the backing.
Did you come across any organizational tips you hadn't seen before? Leave me a comment if you've got other ways to accomplish these same things.
Thanks for stopping by . . . Debby
Wednesday, October 12, 2011
Blue and Cream
Here's a peek at a quilt I started thinking about many months as while it was too hot to quilt. I had purchased a novelty print panel of fabric while on a business trip to California. This is going to be a gift so I can't show the whole thing but here's where I started.
I used the panel fabric to pull these fabrics from my stash. They have all the colors in panel fabric. At my last monthly quilt group I had asked for opinions on which fabrics to use and got some great feedback. They gave a resounding "No" on the floral print. They also nixed the golden yellow, the bright green, and the silver/gray. Good thing I had lots to choose from!
You'll notice that the stars are scrappy but that's not going to cut it for me. I'll be making the stars out of the different blues but each star will be pieced with all the same colors rather than mixing them up.
I'm off to start the cutting!
I used the panel fabric to pull these fabrics from my stash. They have all the colors in panel fabric. At my last monthly quilt group I had asked for opinions on which fabrics to use and got some great feedback. They gave a resounding "No" on the floral print. They also nixed the golden yellow, the bright green, and the silver/gray. Good thing I had lots to choose from!The stripe done diagonally would work for the binding, and the periwinkle blue worked best. There were also a bunch of fat quarters that I've been holding on to forever that seemed right.
So in the end it came down to blues with a hint of periwinkle and cream for the background. My sister had the perfect cream fabric so I got that from her stash.
I cut a few 2 1/2 inch strips from the fat quarters to audition them for the Irish Chain pattern. It turned out to be too complicated for what I needed. SInce I've never done one I didn't want to experiment on this particular quilt. That's a challenge for another day.
I've spent a bunch of time in the past two weeks trying to come up with just the right pattern for this particular quilt. I'm not surprised it took me so long - it usually does! But I have to admit that even I was pretty frustrated at myself for a while there.
So in the end it came down to blues with a hint of periwinkle and cream for the background. My sister had the perfect cream fabric so I got that from her stash.
I cut a few 2 1/2 inch strips from the fat quarters to audition them for the Irish Chain pattern. It turned out to be too complicated for what I needed. SInce I've never done one I didn't want to experiment on this particular quilt. That's a challenge for another day.
I've spent a bunch of time in the past two weeks trying to come up with just the right pattern for this particular quilt. I'm not surprised it took me so long - it usually does! But I have to admit that even I was pretty frustrated at myself for a while there.
Normally I don't worry about time, especially when I'm quilting. For those of you who know me, you know I don't worry about time in general unless it involves an airplane! This time for some reason I was getting anxious about taking too long to decide on the pattern. I just wanted to get sewing! Anyway, I have gathered up just the right combo of blues and creams which coordinated beautifully with the panels.
Picking the pattern was becoming more and more of a chore each day that passed. I'd think I had just the right one until I spent some time with it in the sewing room. Then it would be too complicated (Irish Chain) or too simple (9-patch) or too scrappy or whatever but just not right. Finally, I went back to the pattern that I had originally picked out when I bought the panels. It's in the February 2010 edition of American Patchwork & Quilting. It's called Sweat Tea.
You'll notice that the stars are scrappy but that's not going to cut it for me. I'll be making the stars out of the different blues but each star will be pieced with all the same colors rather than mixing them up.
I'm off to start the cutting!
Labels:
blue,
novelty print,
panel,
Process,
stars
Monday, October 3, 2011
Still Too Hot To Quilt - Looking For Inspiration
I just love starting something new! I had hoped the hottest summer weather was behind us because I'm itching to get started on my next quilt. That first taste of fall in the beginning of September really got me motivated to quilt. Then the little stretch of "Indian Summer" we had last week left me wilted again. So I turned to my favorite alternative to actually sewing and that's THINKING about sewing!
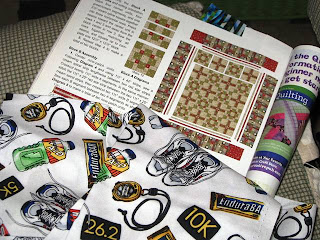
Usually I find choosing just the right pattern to be as much fun as picking the fabrics. I love leafing though the books and magazines I keep in my sewing room. You can see from the picture that it gets pretty messy when I start getting "inspired"! I also enjoy going on-line and checking out other blogs and quilting sites to see what other folks are doing. Attending quilt shows is another way to get inspired. I attended two quilt shows in August so my mind is in overdrive. Here's some close ups of some inspirations.
For example, I saw this beautiful "Rachel's Basket" quilt kit all made up at a Knight's quilt shop in Maine and fell in love with it. The picture doesn't do justice to the colors. There was something about it that just spoke to me. The tiny floral, the soft colors, something seemed so familiar . . . but instead of buying the kit I bought some of the fabrics that were featured in the quilt thinking that would satisfy me. On the ride home I was kicking myself for not buying the kit right then and there.
After I got home I put the fabrics I'd purchased into the laundry hamper so they could be washed. Again I got that same "familiar" feeling. Like I'd seen this white with the rose buds before. You know that feeling? The one that makes you go to your stash and just stare at it?
Sure enough, I already had 3 yards of that beautiful white fabric with the tiny rosebuds in my stash! Then I remembered. I had purchased it in Denver CO while I was there on a business trip. It was intended for the background of a different quilt (one with watermelons) that I was planning to make for myself. Here's a close up of the fabrics I bought in Maine that day. The one in the upper right is the one I'd already bought.
Looking at the fabric again reminded me of that beautiful Rachel's Basket quilt. I just couldn't get it out of my mind. Adding it to my wish list wasn't enough. I REALLY wante to make this quilt. Not as a gift, not to try out a new technique, but just for me because I love it. And I obviously love that fabric since I'd already purchased it for another quilt just for me.
The more I thought about it the more I worried that the fabrics would be discontinued and I might never be able to buy them! Then what! Well, I finally broke down, went on-line to purchase it from the Marti Mitchell web site.
I have to tell you I've never before experienced that sense of urgency when it comes to fabric. Realistically I know that there will always be beautiful fabrics to purchase and wonderful quilts to make but somehow this one just pulled at me and wouldn't let go. When the kit arrived in the mail I was thrill and relieved! I now have it safely tucked away in the sewing room where I can see it often and day dream about making it.
But before I can get to quilts for me, I've got 3 more Quilts for The Girls that need to get finished. I'm working on them, and the blog posts, but I don't want to spoil the surprise so I can't post until they get delivered :-)
Usually I find choosing just the right pattern to be as much fun as picking the fabrics. I love leafing though the books and magazines I keep in my sewing room. You can see from the picture that it gets pretty messy when I start getting "inspired"! I also enjoy going on-line and checking out other blogs and quilting sites to see what other folks are doing. Attending quilt shows is another way to get inspired. I attended two quilt shows in August so my mind is in overdrive. Here's some close ups of some inspirations.
![]() |
| Piled on the table, |
![]() |
| and on my chair and in the basket |
![]() |
| Here's an audition for a sports fabric inspiration |
![]() |
| and one for a coffee panel fabric inspiration. |
Choosing a pattern for a quilt is fun and challenging. Many people leave this decision to others. They simply see something they like and buy the whole thing as a kit. I rarely ever buy kits and if I do they are small projects with specialty fabrics that I don't have in my stash. But, sometimes a kit is the right way to go for me too. It certainly speeds up the process since I fuss over choosing fabrics for ages.
For example, I saw this beautiful "Rachel's Basket" quilt kit all made up at a Knight's quilt shop in Maine and fell in love with it. The picture doesn't do justice to the colors. There was something about it that just spoke to me. The tiny floral, the soft colors, something seemed so familiar . . . but instead of buying the kit I bought some of the fabrics that were featured in the quilt thinking that would satisfy me. On the ride home I was kicking myself for not buying the kit right then and there.
Sure enough, I already had 3 yards of that beautiful white fabric with the tiny rosebuds in my stash! Then I remembered. I had purchased it in Denver CO while I was there on a business trip. It was intended for the background of a different quilt (one with watermelons) that I was planning to make for myself. Here's a close up of the fabrics I bought in Maine that day. The one in the upper right is the one I'd already bought.
Looking at the fabric again reminded me of that beautiful Rachel's Basket quilt. I just couldn't get it out of my mind. Adding it to my wish list wasn't enough. I REALLY wante to make this quilt. Not as a gift, not to try out a new technique, but just for me because I love it. And I obviously love that fabric since I'd already purchased it for another quilt just for me.
The more I thought about it the more I worried that the fabrics would be discontinued and I might never be able to buy them! Then what! Well, I finally broke down, went on-line to purchase it from the Marti Mitchell web site.
I have to tell you I've never before experienced that sense of urgency when it comes to fabric. Realistically I know that there will always be beautiful fabrics to purchase and wonderful quilts to make but somehow this one just pulled at me and wouldn't let go. When the kit arrived in the mail I was thrill and relieved! I now have it safely tucked away in the sewing room where I can see it often and day dream about making it.
But before I can get to quilts for me, I've got 3 more Quilts for The Girls that need to get finished. I'm working on them, and the blog posts, but I don't want to spoil the surprise so I can't post until they get delivered :-)
Wednesday, September 21, 2011
Once A Month Quilters
Seriously, we need a real name for this band of friends. We meet once a month to share some quilting fun and a few laughs. We've never had a name but if I'm going to be writing about us it's time we had one. Any suggestions?
In the mean time here's some pictures of our most recent gathering at Jane's house. My apologies for the picture quality, something was up with the camera that night so most of the faces came out blurry, but the quilts look good!
Tami and Charlene got right down to business with their handwork. That's my green basket in the forefront.
All of these girls do beautiful work. We all have different tastes and I just love seeing what new stuff they bring. I'm the underachiever in the group which is why there are no pictures of my work from that night. I was too busy taking pictures!
Show and tell is always fun. It's great to see the finished projects after seeing them in their early stages. Here's my sister Dutchy with her green alphabet all done. She's been on a roll lately and finished up three or four projects in the last couple of weeks. I've never been interested in doing embroidery but Dutchy does a beautiful job. She takes after our mother who did lovely work.
Now that her grandchildren are getting married she's hoping for great-grandchildren. So this one and a couple of others will be put away until the next generation starts arriving. Here's a close up of the blocks, the letters are cross stitched.
Alphabets are a popular theme this year. Dutchy was finishing up her blue alphabets and Tami was also working on alphabet blocks. These are Tami's with a little girl theme.
Isn't this just the cutest rabbit?
Jane's show and tell this month was Cat's. She's done a beautiful job with choosing the fabrics. Some of them look like fur! Check out the butterfly and the dragon fly.
In the mean time here's some pictures of our most recent gathering at Jane's house. My apologies for the picture quality, something was up with the camera that night so most of the faces came out blurry, but the quilts look good!
Tami and Charlene got right down to business with their handwork. That's my green basket in the forefront.
All of these girls do beautiful work. We all have different tastes and I just love seeing what new stuff they bring. I'm the underachiever in the group which is why there are no pictures of my work from that night. I was too busy taking pictures!
Show and tell is always fun. It's great to see the finished projects after seeing them in their early stages. Here's my sister Dutchy with her green alphabet all done. She's been on a roll lately and finished up three or four projects in the last couple of weeks. I've never been interested in doing embroidery but Dutchy does a beautiful job. She takes after our mother who did lovely work.
Now that her grandchildren are getting married she's hoping for great-grandchildren. So this one and a couple of others will be put away until the next generation starts arriving. Here's a close up of the blocks, the letters are cross stitched.
Alphabets are a popular theme this year. Dutchy was finishing up her blue alphabets and Tami was also working on alphabet blocks. These are Tami's with a little girl theme.
Isn't this just the cutest rabbit?
Jane's show and tell this month was Cat's. She's done a beautiful job with choosing the fabrics. Some of them look like fur! Check out the butterfly and the dragon fly.
Deb (the other Deb in the group besides me) has been working on this heart quilt for a long time. It was all finished, even the quilting, but she decided she didn't like the way it came out. So she took out all the quilting and started over.
She decided to use cross-stitches of large "X"s between the hearts to give it a bit more character. We all agree it looks much better. Then someone, I think it was Jane, suggested that she should quilt around each heart to give them more definition.
And finally she did a cross hatched quilting in the border. Check out the rick-rack around the inside of the border. A lot of work but well worth all the effort. Great job Deb! We all want to steel her cross-stitch idea. I even think I could manage to do that kind of quilting.
Just like Dutchy, Deb had a show and tell as well as a new project to work on. This is her Halloween wall hanging. Jane's giving her some advice on the quilting.
Love the colors! Just in time for fall.
Last but not least we had to wait until the end of the evening to get a look at what Charlene was working on. After some much needed TLC and look how it turned out. This beautiful old quilt came to her as a top that had been machine stitched down. She unsewed pieces and hand appliqued them back onto the top.
Love the colors! Just in time for fall.
Last but not least we had to wait until the end of the evening to get a look at what Charlene was working on. After some much needed TLC and look how it turned out. This beautiful old quilt came to her as a top that had been machine stitched down. She unsewed pieces and hand appliqued them back onto the top.
The yellow is truly that bright! I'm not sure what the design is but Tami took some measurements so we may be seeing one of these from her some day soon.
Here's a close up of it.
Check out those funky fabrics! Pretty wild for 1930's prints. I love the open meandering quilting too. What a great addition to her collection.
The only one missing from the group this month was Carol but she had a great excuse, a new grand baby! Congratulations Carol. We all know you were probably busy watching him sleep ;-D Bring pictures next month so we can ooh and aah along with you.
The time always flies when we get together. Before you know it the snacks arrive on the table, the needles get put down and we all enjoy another story or two before packing up to head home. Check back to find out if we come up with a name - suggestions welcome!
Check out those funky fabrics! Pretty wild for 1930's prints. I love the open meandering quilting too. What a great addition to her collection.
The only one missing from the group this month was Carol but she had a great excuse, a new grand baby! Congratulations Carol. We all know you were probably busy watching him sleep ;-D Bring pictures next month so we can ooh and aah along with you.
The time always flies when we get together. Before you know it the snacks arrive on the table, the needles get put down and we all enjoy another story or two before packing up to head home. Check back to find out if we come up with a name - suggestions welcome!
Labels:
alphabet,
antique,
embroidery,
group,
halloween,
handwork,
show and tell
Monday, August 29, 2011
A Different Direction
I had all the best of intentions when I said I would finish the labels for Audrey and Doris' quilts, I really did! Only one problem, I don't have the quilts here!
A while back I was having some insecurities about the quality of the pictures I was taking for my blog. I had asked a friend of mine, who is an artist, if he would photograph some of my finished quilts in a little more artistic fashion. So now the quilts are at his house and I was completely stumped when it came to making the labels.
So I went in a different direction. I didn't want to waste a whole weekend so I started a new project. Or should I say I picked up one that's been waiting patiently in the wings for many months. I know, I know, I was supposed to finish those darn labels before moving on to something new but . . . we were waiting out hurricane Irene so I couldn't go get them and I'm a very tactile person so I really needed to have them here to make the labels and . . . well, OK, so maybe I gave up too quickly and maybe I was feeling just a little guilty and maybe that's why the next project didn't go so well. Here's what happened after I gave up on the labels.
I've been so excited to get this quilt started, I've had the main fabric for months. It's Debby Mumm's "Java". I fussy cut the blocks like this:
I thought I had just the right mix of darks, lights, solids, and prints to go with the "Coffee" theme fabric.
This one is called Natureland by Janet Houts. I thought the purple blocks would work for the large motifs and the layout has a large pinwheel effect.
Next possibly choice is Tranquility by Bev Getschel. I really like the way the cream color creates a border around the center block. Again, I thought it would be perfect for the large motif. This quilt also has a secondary pattern when you see it laid out. If you look just right on the bottom right you can see a star.
Pattern # 3 is Winterberries by Michele Crawford. This one seemed good when I first saw it but I'm liking it less for this project and more for a Christmas Quilt for me ;-)
I spent considerable time on Sunday auditioning these three patterns and still didn't make a decision. However, I did get to try a new technique - tube quilting. I had seen this tutorial on Missouri Star Quilt Company. It was amazing to see it done and a hoot when I tried it! She did hers with two strips sewn together then combined with a third strip to get a sort of "string" pieced block.
I just used two strips and came out with half square triangles. It took me a couple of tries to get the measurements right but it was so fast I don't think I'll ever make them the old way again. Or you can try it this way, using two charm squares to get 4 half square triangles. One word of caution, the cuts are on the bias so you have to be careful when pressing. I starched the tube when I pressed it to help keep everything stable before cutting. Give it a try you'll love it!
I'll be giving the "Coffee" quilt another try tomorrow night. Stay tuned.
Saturday, August 27, 2011
Betty's Label
Check this one off the list! I finished Betty's label last night and even got it sewn onto her quilt. It didn't take long and I'm so happy its done.
Here's where I started: on the computer. I have a PowerPoint file that I'm using to create all the labels for the quilts I'm giving to The Girls.
I know I've said this before but I can't stand to have a big honking white label on the backs of my quilts. So I try to incorporate elements from the front to create a unique label that will coordinate with the quilt rather than scream at the viewer. For this one I used a portion of the Disappearing Nine Patch block as the layout for the label.
I printed the page and taped it to my light box. I've found one of the stock fonts that came with the software works well for me to trace onto the fabric. The lines represent the finished seams.
Here's where I started: on the computer. I have a PowerPoint file that I'm using to create all the labels for the quilts I'm giving to The Girls.
I know I've said this before but I can't stand to have a big honking white label on the backs of my quilts. So I try to incorporate elements from the front to create a unique label that will coordinate with the quilt rather than scream at the viewer. For this one I used a portion of the Disappearing Nine Patch block as the layout for the label.
I printed the page and taped it to my light box. I've found one of the stock fonts that came with the software works well for me to trace onto the fabric. The lines represent the finished seams.
I placed the fabric on top of the printed page on the light box. In order to be able to sew the blocks together later I eyeballed a 1/4" seam allowance that is hanging over the lines. I used scotch tape to hold the fabric in place and simply traced the letters onto the fabric.
One thing I forgot to do was add a fabric stablizer to the back of the fabric before writing on it. That's a trick my sister told me about that I haven't tried yet. Since I'm in the label business this weekend I'll let you know how it turns out on the next one.
I like to use a Micron Pigma pen that has an archival safe, permanent ink which is also waterproof and fade proof. I've been using them in my scrapbooking for years. One of the reasons I like them is I've found that with the variying sizes of the tips I can get clear lettering even if the text is small. I used a 05 tip for the word "Chippers" and a 01 tip for the rest of the words.
I had chosen 4 fabrics that are used on the front of the quilt to use in the label block. It's important to pick fabrics that are light enough to show the lettering but that will also blend well with the backing. Here's a layout of the fabrics after the writing was completed.
The orange square is one of the fabrics that is so striking on the front so I really wanted to include it in the label. The square in the picture was too small for the next step so I used a larger strip when I sewed the squares together.
Before sewing the block I heat set all the words with a dry iron. Notice I said a DRY iron? Remember the watermelon label? That lesson is still fresh in my mind!
I sewed the squares together into a block then trimmed off the excess fabric. I find it's easier to get the words on the fabric first, adjust the seams to get everything lined up correctly, then trim the block to the size you want. It also gives you some wiggle room in case you mess up when you're writing. This way you can switch out a square rather than trashing a whole block. Again, I speak from experience ;-D
At just over 4 1/2" this block is bigger than I would have liked but it fits the scale of the blocks on the front as well as the overall size of the quilt (49" x 62") so it works.
Although I dislike labels in general, I really enjoy the hand work that comes with adding the label to my quilt. Now that's a comment I never thought I'd make! Up until about a year ago I was strictly a machine kind of quilter. Then I fell in love with the Twiggy quilt and it changed my whole perspective on hand work.
Now I even enjoy basting! So as you can see I basted the seams down and pinned the label on to back. It's sewn safely into place and I think it looks pretty good . . . for label.
I can hardly wait to call Betty to make arrangements for a visit to give her this belated birthday gift. If you're curious about the front of Betty's quilt you can see it here.
Today's challenge: Labels for Audrey and Doris. I like the look of the hand printing on my lables but I also like to try new things. So I'm going to try printing from the computer onto fabric for one of my next labels. Which one will it be?
Thanks for checking in.
Debby
Wednesday, August 24, 2011
Final Touches
Why is adding the label so hard?
So maybe that's what's really going on with me and labels. Putting the label on means giving the quilt away. No matter how much I want to give my quilts away, each one is a labor of love and parting can be such sweet sorrow.
I debated long and hard about what kind of label to put on a baby quilt. I'm not a fan of the big white patch with lots of writing stuck to the back of a quilt. I understand the reasoning behind it, documenting the details, but I don't care for the look of it. Besides, I make my quilts in hopes that people with USE them. So if that's the case, I don't expect them to survive for long, especially in the case of a baby quilt.
![]() |
| Betty's Quilt - Chippers, Cats, Camping & Beer |
I'm ready to get started on my next projects but there are three quilts that still need labels. I still need to get the labels on the quilts for Audrey and Betty before I can deliver them.
And the quilt for Doris has been done for literally YEARS but still has no label. Well, OK, I know why Doris' quilt doesnt' have a label, it's because I just can't bare to part with it!
So maybe that's what's really going on with me and labels. Putting the label on means giving the quilt away. No matter how much I want to give my quilts away, each one is a labor of love and parting can be such sweet sorrow.
I did manage to get a label on the baby quilt for Trevor. I had hoped to get to meet him and see the rest of his family last weekend at his Uncle George's BBQ but they had a break out of the chicken pox and couldn't attend. That's fine, I'm good with waiting until the childhood illnesses are fewer and further between! I delivered the quilt to his Uncle George who passed it along to Trevor's Grandmother. Slowly but surely it's making it's way to its new home.
I debated long and hard about what kind of label to put on a baby quilt. I'm not a fan of the big white patch with lots of writing stuck to the back of a quilt. I understand the reasoning behind it, documenting the details, but I don't care for the look of it. Besides, I make my quilts in hopes that people with USE them. So if that's the case, I don't expect them to survive for long, especially in the case of a baby quilt. I finally concluded that writing directly on the back of this quilt with a permanent marker would be just the ticket. Nothing to come unstitched and fall off in the laundry. The picture isn't the best but you get the idea. I followed the quilting lines and added the appropriate info; his name, the date, and my name. Enough said.
So I've set a goal for myself to get the other three labels done before moving on to the three new projects waiting in the wings. I have bigger plans for these labels than this one. You'll be the first to know what's happening as I finish up! Then they will all be ready to wrap up and give to their intended owners, even Apple Blossoms for Doris.
Thanks for visiting!
Subscribe to:
Posts (Atom)