Sunday, July 10, 2011

Watermelon Label


Here's to the happy couple!  I hope they spend many years together and have a lots of chances to sit on their quilt enjoying a picnic.

The finished Watermelon quilt measured 53" wide by 60" long.  The last piece of work is making the label and getting on the quilt. You know they say that it's not a quilt until it's quilted.  Well I'm a firm beliver that it's not a quilt until the label is on it!

Having said that, the quilt label is one part of the quilt that always poses a challenge for me.  Most quilt labels I've seen are just big white squares of writing documenting the receiver, the quilter, the date, the event, etc.  Some of them can get very long and in my opinion just ugly!  So I'm always trying to make sure that while I document all those important things the label doesn't detract from the overall look of the quilt.  Here's a one label I did that didn't follow the usual big white box theroy:  Twiggy.

So I had this great idea for a label on the Watermelon quilt.  I wanted to make a slice of watermelon where I could write in the white part of the rind!  And then, because the backing fabric was so busy, I was planning to set the slice on a red and white checked fabric made into a napkin.  It sounded good.  The picture in my mind was clear as a bell but I wasn't sure how to do it.  The entire time I was making the Watermelon quilt the label idea was percolating in the back of my mind. 

This is a huge part of the creative process for me.  While my hands are busy doing the work my mind can wonder.  The possibilities are endless.  The freedom is exhilerating.  The down side?  It's also how things can go wrong!  You'll see what I mean, keep reading! 

I checked on-line to see if I could find a template of a slice of watermelon to print out.  I found a tutorial for a pin cushion at the Dakota Cabin Quilts blog that I thought would work.  Isn't it adorable!


I copied and pasted it into PowerPoint, used word art to craft the word on a curve and hit the print button.  Oops, I forgot the printer was broken!  Off to Staples to use their printer.  At this point in time I was still working on the seeds for the quilt which meant I didn't have time to work on the label.  I put the print out in the pile with the other stuff for this part of the project and finished up the seeds.

Piecing the blocks into rows and the rows into a quilt top went along without incident.  The backing was a bit more work but it too turned out just fine. (See the post for July 1, 2011).  

After I sent the quilt off to the long arm quilter I started working on the label in earnest.  First came the red fabrics for the melon part.  Each of these fabrics was used in the log cabin blocks on the front.  As you can see I had plenty left over to play with.


I cut strips 1 1/2" wide and


sewed them together to create a strip set.  This was fun and pretty quick.  I love that I can chain piece them so they fly though the machine.  Here's where my mind starts to work out the "how do I cut that curve"?


I cut the strip set into 1 1/2" inch wide segments.  Using one segment as my starting point I sewed all the others together end to end.  With the polka dots as a reference point, I staggered the segments and just removed the stitching from the long strip at the appropriate breaking point to get the next row. 


I pinned each row together before sewing because I wanted to make sure the seams were nested and stayed that way as I sewed.  There were plenty of seams so the nesting helped keep the intersecting seams square and flat.  No mind wondering allowed here!


Once again I was working last at night so of course, you know Guppie would have to get involved!  I feel I should mention here, for all of you who are NOT cat lovers, I always wash and dry my quilts just before wrapping them up so they are fresh and clean when they arrive as a gift ;o)


I pressed the final patchwork to try to get it as flat as possible since I'd be sewing and cutting it some more.  The reds were beautiful and there was plenty of time before I'd have to finish the label so I just pinned it to my design board and admired it while I continued to work out the finished product in my head.

A week long business trip to New Orleans interupted my sewing rythm but how else am I going to afford this wonderful hobby of mine.  So a couple of weeks later I picked up the finished quilt from the long arm quilter.  I was so thrilled to see that the backing had turned out just right.  The quilting was beautiful.  It was all coming together. 

With a week to go before the wedding I had timed every down to the last minute.  I bought a new dress, looked for new shoes but didn't find any, stuck to my workouts and my diet, got the laundry and housework all done so my weekend would be stress free.  My mother would be so proud!  Yet there was always that label in the back of my mind.  I didn't dare get started on it becasue I knew I wouldn't be able to put it down.

Finally, it was time to finishing up the label.  On a piece of white paper, I drew a curve  the shape I needed for the final watermelon slice .  I then cut out the words I had printed and, using my light box, I arranged the words to fit the curve.  I taped it all down with clear tape so it wouldn't move.


  Next I placed a piece of white muslin over the arrangement to trace the lettering. 


This is the method I use the most when making quilt labels.  It gives me a guideline to follow but I'm still writing it by hand rather than printing it out onto the fabric directly from my computer.  (That's going to be something I'll try when I get my new printer.)  The arc you can see at the top is just some of the words that were printed on the paper that weren't the right size.

To cut the curve of the rind I placed the white fabric on top of the green, with both right sides facing up.  I placed the paper template on top of the white fabric and lined up the words. 

Using my rotary cutter I cut through all three layers at once to get the perfect matching curve on each piece!

This was the first time I had ever done a curved piece for a quilting project.  Turns out it's just like setting a sleeve when sewing clothing! 

To sew the pieces together I placed the white fabric on top of the green, right sides together.  I lined up the center of each piece and pinned it. 

Next I pinned the corners.  Then worked my way from one side toward the middle by aligning the fabric edges along the curve.  I used lots of pins to keep it straight.  With the white piece on top I could see if I was too close or too far from the words.  I didn't want to have to re-do the words so I carefully lined up my fabric edge with the edge of my  presser foot which just happens to be quarter inch wide.

After looking at it I was pleased with the results but it seemed awfully large.  I didn't want it to be the focal point on the back of the quilt.  I just wanted a little bit of fun rather than a big honking label. 

I decided I'd have to cut the pieces as if it was a pie in order to get the right size for what I had envisioned. 


With that accomplished I repeated the process for getting the curve cut on the melon side.  Then I stitched the "rind" to the "melon".  You can see from all the pins I wasn't taking any changes of things slipping as I sewed.

Aren't they just adorable!  I loved them!  One final press and they would be ready to applique to the quilt.  Still thinking about how I was going to do that I went to the ironing board, spritzed the slices with lots of water and watched as THE INK RAN right before my bleary eyes!  I stared in disbelief.  How could this happen!  You guessed it, I was so busy thinking about getting them on the quilt I forgotten to heat set the ink before dousing the pieces with water.  The creative part of the process had just sabotaged the whole thing!


Thinking I could stop it before all was lost I grabbed the hot iron and laid it on the wet fabric.  When I lifted the iron all I could see was the red fabric had bled through the white and mixed with the smeared black ink !!!  Talk about a HOT MESS!  I would not have believed it if I wasn't holding it in my hand.   


This is what happens when it's late at night and you're getting tired and your mind is racing on to the next step.  I should have just stopped when the sewing was done and gone to bed.  Yet, I knew I wouldn't have been able to sleep until I got them sewn on the quilt so I had kept on going.

Now what was I going to do?  It was about 10 pm the night before the wedding.  I knew the next morning would be spent packing and pressing our clothes before we got all decked out for the festivities.  And I still needed to wash and dry the quilt before wrapping it.  No time left for sewing!  

I had just spent the better part of 2 hours making these precious slices of watermelon.  It was too late to start over.  As any quilter will tell you, it's after making a mistake like this that you really have to be creative!  Not the leasurly, mind wondering kind of creative but the thinking fast on your feet creative.

I stopped for a few minutes to consider the alternatives.  There weren't many!  I wanted to give them the quilt the next day and I wanted it signed.  Signed!  I had a flash of a recent video I had seen where the author demonstrted writing directly on the quilt with a permanent pen.  Literally signing the quilt.  Luckily for me the fabric on the back of the quilt had all those cute little watermelons with lots of places where the white of the rind could be used to write the words:

Courtney & Miles     July 2, 2011     Made By Debby Michel

Here's how it finally turned out.


In the end I liked the simple words integrated into the fabric and not sticking out as a big label on the back.  The slices would have been nice and I could have made them tasteful but this turned out great.  In fact, I'll be sure to keep this in mind the next time I get a big creative idea for a label; simple works just as well.

I finally went to bed and slept soundly knowing the quilt was done.  I had a bit of an anxiety attack as I put the quilt into the washer the next morning.  Was the red going to bleed into the white on the front of the quilt?  No it didn't!  The quilt washed and dried beautifully.  The washing and drying is an important point for me since I always hope people to use the quilts I make for them.  If they are too hard to take care of people won't use them.

To wrap it I had purchased an insulated cooler bag that can be used for picnics and placed the quilt inside along with a card.  


I tied a bow on handle and dropped it off at the gift table as we enter the reception hall.


Have you ever messed up a great project at the last minute? 
Leave a comment, I'd love to hear from you.

Friday, July 1, 2011

Finishing The Watermelons

It's getting down to the wire for the upcoming wedding so I've been diligently working on the Watermelon quilt. You may remember on my previous post "Watermelons for Miles and Courtney" I was struggling with not enough fabric for the backing.

No matter which way I calculated it, the 3 yards of beautiful watermelon print I had just weren't enough because it's directional.


I ironed it, I measured it, I flipped it around, I ironed it again, I flipped it this way, then that way; I tried and tried and tried to make it work. The harder I tried the harder it got.


Finally, I decided to use the print as a center panel and put a border around it. Off to the fabric store for some green "rind" colored fabric. I found a great match and stitched the whole thing together but had to call the Lorri to let her know I'd be late with dropping it off.


Lorri Wurtzler, whose longarm quilting business, Seventh Heaven Quilting, is just minutes from my home in southern NH has been doing a great job on the quilts I've brought her. The watermelon quilt is just one of three she has quilted for me recently. Working with Lorri to choose the pattern and the thread for the finishing touches is a great part of the creative process that's really fun for me. I usually have an idea of how I want the quilting done and she is able to take that idea and execute it with beautiful results.  Longarm quilting is a life saver for me! I would never have been able to quilt any of my projects, by hand or machine, and get them completed when I wanted them.

Here's a peek at the back corner before I got the binding on. The border on the watermelon fabric turned out fine. You can clearly see the vine/leaf pattern here on the green border.


But what really makes the whole quilt top is the contract of the deep pink threads on the whites of the quilt top. It is pretty in the pictures but just beautiful in real life!


With the quilting completed it was time for binding.  I had been using the same binding instructions for the past ten years.  One of the things that I really didn't like was how bulkie the closure was when you got to the end.

I decided to go on line to see if there was an easier way. I saw a tutorial on the Missouri Star Quilt Company's You-Tube site. They were demonstrating a new template used to make bindings. I was so excited I was ready to send away for it right then and there! That is until, after a few watching a few other videos, I came across one that showed how to do the very same thing without the template. Since time is always of the essence for me I studied the video and tried the new technique. So, I'm not usually the first to do most things but I catch on pretty quickly.  With a little practice, this technique worked like a charm!


Oh, and a second tip I found was winding the prepared binding into a coil. I used to just gather it all up and drape it over my shoulder for safe keeping as I sewed. The coil worked much better.

All the machine stuff was done. Now to the relaxing part, hand sewing the binding. I've seen some videos of people using the machine to finish off their bindings but unless it's a small project I'm not sure I'd want to do that. I enjoy taking my work out of the sewing room and spending time watching TV with the family. Sports are always a good choice for this activity. Luckily here in New England we have four championship teams: the Celtics, the Patriots, the Bruins, and the Red Sox to keep us entertained. Since it's summer now we are taking in the Red Sox games. So I grabbed the quilt and my sewing basket and headed to the living room.


Now you may remember that Guppy is often fussing around my sewing table as I sew but I don't think I've mentioned Alice. Alice is Guppy's sister. She's pretty and she knows it. She feels no need to get involved with the noisy sewing machine activities (although the ironing board does appeal to her so I always have to close it up if it's not in use). Instead, she naps in the kitty bed placed on what was supposed to be the comfy chair for me to use in my sewing room. Oh well . . . 

Alice decided that getting a close up view of the hand sewing of the binding would be a good way to get involved in the watermelon quilt. One evening she strolled in to the living room as I was getting all comfy and ready to sew.  You know how it is, you get the lighting arranged just right and everything within arms reach. She announced herself with a meow, then parked herself on the coffee table. Watching me from across the room.  Just taking it all in, no big deal. Certainly nothing she was interested in.


As I started to sew she came closer, sitting beside me, just touching the quilt at the edges.


She gave it her best "I'm ignoring you" pose, acting as if she really wasn't interested in any old quilt. After all, quilts are all over the house, what's so special about this one? (Settling in a little closer.)


I asked her how I was supposed to get anything done if she was on the quilt. Her ears twitched back and forth in the "don't bother me" pose, which lead to full on relaxing in anticipation of a good nap!


Well, on this particular day the temperature was in the 80's with very high humidity. The quilt in my lap was hot enough but adding the lounging cat was more than I could take. All I needed now was a random hot flash and I be a gonner! I left her and the quilt in the comfy spot, with the lighting just so and everything within arms reach.  I got myself a big glass of iced tea to enjoy the rest of the baseball game leaving the sewing for another day.

Over the course of the next few evenings, as the Red Sox climbed higher up in the standings, the weather cooled considerably and I was able to finish the binding.  Alice never showed any more interest in the watermelon quilt!


Next up, the label.  Check back in, it'll be finished soon because the wedding is July 4th weekend!

In the meantime, do your pets enjoy your hobby as much as you do?


Thursday, June 30, 2011

Slow Poke Quilter

The truth is I am normally a slow poke at EVERYTHING! So it's funny I should find this site, Slow Poke Quilter, just now when I seem to be whipping out quilts left and right! I saw the badge on my friend Minka's BLOG and after checking it out I had to add it.

You see, I've challenged myself to create a quilt for each of my friends (
The Girls) for their birthdays.  Of the seven quilts on the list I've completed 3, have one in process, and three percolating between fabric/color choices and pattern choices.  Mind you, I started this project the year BEFORE I turned 50 and suffice it to say that, while I'm the oldest in the group, we are all now PAST 50! So I promised myself that this is the year I will finish all of these quilts.  Meanwhile, I've got a whole list of other quilts that are ideas just waiting to materialize.

I truly enjoy the process of quilting from start to finish.  Starting with picking the patterns and fabrics.  I pour over magazines, read BLOGS, visit fabric stores, check with my quilting friends, and go to quilt shows.  This activity alone can entertain me for weeks and months on end. 

My sister Dutchy and I have taken many quilting classes together. She shows up to the class with all the fabrics for the project washed, pressed, and neatly cut so she can sit down and get right to sewing.  I on the other hand show up still missing a key fabric or two which leads to shopping when I should be sewing.  She ends up with a finished bed size quilt while I've created a potholder!   But never mind, she's an over-achiever and I love her for it.  She encourages me and helps me out when I'm stuck or a deadline is looming.  She's definitely NOT a slow poke.

Twiggy has
appliqued
leaves

Actually, she's just one of the over-achievers in my monthly quilting group.  Each one of the ladies in the sewing group is talented and creative.  They produce beautiful work!  I am always anxious to see what they've come up with and hear the stories that go along with each quilt or wall hanging or other crafty project they're doing.

We all had a good laugh at our last get together over how many items I'd brought for Show and Tell.  I'm notorious for not having anything new to share.  This month I had 2 finished quilts and a very creative label for the one I had just dropped off at the long arm quilter.  

Appliqued bikini

I've learned so much from them over the past 10 years it's been wonderful.  Most recently they taught me to hand applique.  Here are a couple of examples of my applique efforts on Audrey's beach quilt and on the "Twiggy" quilt. 

Three of the group members are expert hand quilters so the next thing I want to learn from them is hand quilting. 


From the beginnings of the group they have tried to entice me to join them in a true  "group" project.  You know the kind, where someone has a really great idea for a quilt or a cute pattern to share with everyone?  Sometimes a person will show her work and others in the group will just decide to make the same thing.  I've liked some of the ideas and didn't care for others but I really loved that they wanted me to join in.  

Unfortunately, I am never able to participate in these activities because the pressure to perform becomes too stressful for me.  There's no pressure (or should I say very little pressure!) from them but I'm just such a slow poke I know I won't be able to finish when they do so I just don't join in.  Besides, the last thing I want is a stressful hobby!   

Here's a beautiful example of a group project the "just happened".  Two of the girls in our group are cousins, Carol and Deb.  Both are from my hometown, where Carol and I went to school together.  They had started this quilt at the same time and brought it to our monthly sewing group.  It was so much fun to watch the progress.
 

Deb, Dutchy, and Carol with their "People" quilts
at the 2009 Capital Quilters Guild Show in Concord NH

I just love these "People" quilts!  The girls shared fabrics and even a few blocks but you can see that there are differences.  Deb and Carol used the angled borders and corners while Dutchy adapted hers to be square on the out side corners.  Each of the figures developed it's own personality as the girls added the clothes and hair styles.


These are Carol's "People" - look at the braids!

Dutchy decided that she's like to make one too. She spent many enjoyable hours creating the little folk around the edges.  In the end, she gave the quilt to the Rector and his wife when she retired from St. Paul's School in Concord NH where she had worked for over 25 years.

These are some of Dutchy's "People" - Check out the baseball cap
and the pockets on the pants!
While the three girls worked diligently and entertained us with the creative process, rest of us in the group chickened out.  Or should I say I chickened out.  For a slow poke like me this looks like a life's work!  I could never have managed to get it completed in time for our semi-annual Capital Quilters Guild show like they did.

For a very long time I believed I was alone in my languid approach to quilting but finally I've found some kindred spirits on-line.  So I will continue to indulge my slow-pokieness to my hearts content. 

By the way, I've saved all those patterns and tucked away the ideas in hopes that someday I may just surprise my quilting friends with my entry for the "Group" project . . .  just a bit later than planned.

Would you attempt a project like the "People" quilt?  How long would it take you?  Are you a slow poke quilter or a slow poke in general?  Maybe you have a friend or family member who makes you wait all the time.  Admit it, you're still happy to see us when we finally show up right?  ;o) 

Leave me a comment below, I'd love to hear from you.

Saturday, June 25, 2011

Watermelons for Miles and Courtney

Ah, weddings!  We have three of them lined up this summer.


My sister Dutchy and her daughter Sharon who
 is mother of the groom at this wedding.

My sister's two grandchildren, David and and his sister Lindsay.  Their poor parents, two kids getting married in the same year!  So, that makes me the grandmothers sister!  

OMG, I'll never forget attending a family event years ago when I was in my 20's and introducing my Aunt Dot to my boyfriend.  I said "This is my grandmothers sister".  I remember thinking at the time that she was sooo old because she was my grandmothers sister!  

Those words are ringing in my ears now and I'll bet the kids are thinking the same thing of me; that's my grandmothers sister, she's sooo old!  Well, I don't feel old!  I always admired how young in spirit Aunt Dot was.  She had snow white hair but there was certainly plenty of sass to go around!

Jim

Wedding number three is in July and this one is the son of my friends Kim and Jim.  We all grew up together in a small NH town.  Funny story about how Kim and I are related which I'll have to write some time but for now just know that Kim and I have been friends since grade school and Jim is my second cousin on my fathers side.  Miles, their son, is marrying a lovey girl named Courtney.

Kim

So why am I babbling on about weddings instead of quilts?  Well, weddings are the perfect time for making a quilt!  Although the Big Guy can't seem to appreciate it.  His comment on the last wedding quilt I made was "yeah just what every guy wants for a wedding gift - a blanket".  Maybe he's right but that hasn't stopped me from getting excited about making another "blanket" for a wedding gift.  Or maybe he's just disappointed because he's still waiting for his quilt to be finished! 

Anyway!  Back to the wedding quilts.  My sister's grandchildren both wanted quilts from her for their weddings so she was happy to oblige.  That meant I wouldn't be making quilts for them but there's still Miles and Courtney!  These two are young, fun, athletic, outdoors kind of people.  I wanted a quilt that they could throw in the car and pull out anytime they want a clean, dry place to sit whether it's after a hike in the mountains or a day at the beach.

In keeping with the philosophy of "sharing the process", here's the story of the "Watermelon" quilt for Miles and Courtney.  Several of the girls in my quilting group have made the watermelon log cabin quilt. In fact one of the girls ended up making 7 of them! I loved the design and thought it would be perfect for the kids.

Since I'm "scrappy" challenged I usually shy away for traditional scrappy quilts.  I often get stressed out with the whole idea of combining very different fabric patterns and colors into a finished quilt.  I'm much better at two color or three color designs.  But I have found that log cabin blocks are a great way to get a scrappy look without the stress.  That being said here's what happened.
I started with these green and cream blocks. 

Can you spot the problem?  The logs are in the wrong order! LOL!  I didn't notice until I put the finished blocks up on the design wall. 
This is the danger of scrappy for me, the coloration in the fabrics is subtle so to get the right look you really have to pay close attention.  And, power sewing all the blocks at the same time means all the blocks are the same kind of wrong.

This is supposed to be the rind of the watermelon but if they're wrong you lose that effect.


You can see in the close up on this block that all the outer logs needed to be rotated to the left one log.  So I had all the pieces, just not in the right places.


The fix for this is you have to take them apart.  No two ways around it, just get out the seam ripper and start "unsewing" . . . all 30 blocks  :-(   Here are the pieces all apart, ready for sewing round 2.  


I used a seam ripper to take them apart.  My sister was watching me and reminded me that we learned to take out seams with a double edged razor blade!  Have you ever done that or see it done?  That's how Mom taught us.

Guppy was very disappointed in all this re-work business.  He was ready for bed and hates it when I'm up late sewing.  I thought he'd move when the pieces started to pile up on top of him but he wasn't budging.


Once the green blocks were sewn back together I laid them out again to check the orientation and get a feel for the size of the final quilt.


Now that's more like it!  Just like the layout in the pattern.  This is important because in the end these are supposed to be watermelon rinds.


With my lesson learned on the green blocks, the red blocks went together much easier, no re-sewing.


The pinks and reds just made this quilt jump off the wall.  What a huge impact that burst of color made.  Now it's starting to look more like watermelon.


Next came the seeds.  With all the work and re-work on the green blocks I had forgotten about this little detail.  I was undecided as to how to attach them.  The directions say to use fusible web and machine applique.  There were over 80 seeds to be applied and I'm not a fan of machine applique.  I know it's easy and with bigger pieces it might even have been fast but 80 seeds the size of a quarter?  Besides, I wasn't sure I had enough time. 


So I opted for fusible web and ironed them on with the intent of having the long arm quilting stitches go over them to keep them attached. 

They are really cute!

Once the seeds were on the pink/red blocks I sewed all the blocks together in the standard method of sewing blocks together into rows then sewing the rows together into the finished top.


Next came the backing.  I had purchased the recommended yardage of this perfect fabric according to the pattern directions.  One small problem, did I mention that the perfect watermelon fabric is directional?  Lesson 2 on this quilt, make sure you know if the fabric is directional or not before having it cut at the store.  I didn't have enough of it.  Now what!  


I can tell you this is not the first time I've run into this problem but I am getting better at buying the right yardage as I continue to make more quilts.  I knew I just HAD to use this fabric!  It's perfect!  It's watermelons for Pete sake!  The label on the salvage said it was made specifically for Joanne's but there wasn't any at my local store.  Time was getting even shorter at this point.  I was supposed to be dropping the quilt off at the long arm quilter in two days.  No time to find it on line and get it shipped.  I just had to come up with a solution and QUICKLY.

Taking a cue from my first quilt and decided to buy some green fabric to use as border around the watermelons. 

It turned out great and as soon as the bindings on I"ll post the final pictures.


Wednesday, June 8, 2011

Caroline's Mermaid Quilt

The Mermaid Quilt - Day 1
 
Wait till you see how this
beautiful panel gets center stage.
 A few of weeks ago I had a rare opportunity to spend 2 days quilting at a friend’s house.  Now, my friend Jean doesn’t quilt – although I know she would love it if there was time in her hectic days – but her daughter, Caroline, took to the sewing machine like a fish to water! 

Another rare event was to be joined by our friend Sully who drove 3 hours just to get in some quality quilting time.  I can't thank you all enough for such a fun couple of days!  I rarely get to share my love of quilting with interested parties.  I'm usually boring some poor soul to tears as I babble on about fabrics, patterns, blocks, applique’, borders, and backings . . . . hence the BLOG   ;o)

Years ago, when Caroline was just a baby,  Jean got a new sewing machine.  She asked me if I would come by some weekend and help her with making some baby clothes.  As life would have it our schedules kept us both so busy that our sewing date (and the baby cloths) never happened.  We often talked about it and as Caroline got older we agreed it would be fun to teach her to sew.

Jean's dining room became
the sewing room
 Well, 11 years later, the stars finally aligned.  I showed up at Jean’s with sewing machine in hand.  And let’s not forget all the other paraphernalia like the cutting mat, rotary cutter, fabric, thread and 3 more bags of stuff that were all packed tightly into my car, just in case.  Oh and PJs and a pillow.  After all it was a sleepover!

I don’t know who was more excited to get started Caroline or me.  I had picked out a selection of fabrics from my stash that had pretty spring daisy pallet.  I also had a kit that had the fun mermaid panel.  Once she spotted the mermaid there was no going back.

The block I wanted to teach Caroline is the Disappearing Nine Patch.  I had used it on Betty's quilt and loved the way it turned out.  It's such a simple block but it looks much more complicated when it's all done.

Caroline had never used a sewing machine before and I had never seen Jean's machine.  Using a sewing machine is kind of like driving a car.  If it's your own you're able to jump in and hit the road, if it's a rental you need to take a few minutes to see where all the buttons are and what they do.  I had Caroline use the owners manual to look up anything that wasn't obvious.  In short order we managed to get the stitches set up, the machine threaded and eventually even wind a few bobbins.
 
Next we tackled cutting.  I showed Caroline how to use the rotary cutter but after a few closely supervised tries I decided she wasn't quite strong enough to use it and my nerves weren't strong enough to watch! 

On to Plan B.  I did the rotary cutting and she did the fussy cutting.  Using a 4 1/2 inch square ruler she traced around the pretty mermaids, then cut them out.


A few quick instructions on how to sew the squares into rows and the rows into block
and she was off.


I was amazed at how quickly she picked up on all the directions I was giving her.  I was trying to keep it simple but as you can tell by my writing "short" is not something I do well. 

Even to me it seemed that I was just talking and talking and talking.  I kept thinking she's going to get sick of hearing my voice!  


But she was very focused and absorbed everything I said.  It wasn't long before she was just cruzin' along.
We worked as a team:  Caroline sewed the 9-patches together; I cut them up to make them "disappear" and she sewed them back together to form the new block. 

Isn't this one beautiful!!!  Once she had the hang of it she managed to get 6 blocks done before we stopped for dinner. 

In the span of just 4 hours she had learned how to use the sewing machine and created 6 beautiful blocks.   I know it must have taken me a lot longer than that for my first blocks!  Along the way there were a couple of opportunties for "reverse sewing" so she did get to use the seam ripper! 


After dinner Sully arrived.  We set up her sewing machine and mine on the table as well.  She had seen my pictures of Betty's quilt and wanted to try the Disappearing Nine Patch block for a quilt for her daughter. Fortunately, Sully is a quilter so she was set up and sewing in no time. She was also able to lend a hand with helping Caroline as well.  The dining room was now fully transformed into quite the classroom. 


Since we were working in the kitchen/dining room we had to improvize.  The kitchen counter became our cutting surface and the dining room table became the sewing table.  The big advantage to not having Mom around was we could use the curtains as a design wall.  Hey, she said do whatever you want right? LOL! 

Jean arrived home late after a long day at work to be greeted by a very excited daughter, two good friends, and a kitchen turned up-side-down!  Caroline caught her mom up on all the activities of the day and did a  show and tell with the blocks she had finished.  She also included a vocabulary lesson on all the new sewing terms she'd learned.  Once again I was amazed at how much she learned!

It took another hour before Caroline finally went off to bed but not before she had finished the last stitch of the block she was working on. 

There is definately more to this story so check back again soon for Day 2 of The Mermaid quilt!

In the mean time I've got a couple of other projects I want post in the next few days.  Both the Baby Quilt for Trevor and the birthday quilt for Betty are back from the long arm quilter and ready for bindings.

Sunday, May 22, 2011

Sticker Shock!

My sister Dutchy and I went to Keepsake on Saturday but couldn't manage to spend more then $50 between us!  That's pretty unusual especially since I had saved up over $300 in anticipation of our trip. 

Keepsake is one of our favorite quilt shopping trips.  It's a scenic ride into the Lakes Region of NH so we get to see the lakes and mountains as we drive.  It's also a chance to spend hours talking about everything from our latest quilting projects to what's happening in the family. 

After leaving Dutchy off at her house I began the one hour drive back home.  I got to thinking about why I hadn't bought more fabric.  Besides the fact that I really don't NEED any more fabric, I really think I was having a bit of sticker shock.  Most of the fabrics were around $10 a yard.  I was really having trouble with paying that much - even though I had the money.  I think if I had seen something I couldn't live without I'd have bought it but nothing was pulling at me. 

We had talked about the price increases the night before at our quilting group.  I hadn't really thought about it but flooding has caused cotton crops to fail which raised the prices of cotton.  It really didn't hit home until I saw the prices at the quilt shop.  Come to think of it we also notice higher prices when we were visiting Lancaster PA earlier this year.  Looks like I'll be breaking into my stash more often!

One of the many good things at Keepsake is their Outlet.  They now have a whole room of discounted fabrics, pattens, and notions.  Prices were slashed as much as 75%.  I also picked up some novelty fat quarters and a pattern for $0.49!  That's my kind of shopping.  My big score of the day was this backing for my 1930s Bunny quilt.  It was on sale for half price at only $3.99 a yard. 

The top of the Bunny quilt is done and I just love it.  I'm planning to hand quilt it.
You can find the pattern here. 

This picture doesn't do the backing fabric justice,
it's a beautiful pink  . . . with BUNNIES!

Now I'll just have to squirrel away the $300 for some other quilting adventure.

After spending hours in the quilt shop we finally headed home.  On the way, we stopped in to see our sister Sue.  She's always got something going at her place.  This time it was trees and brush cleared out back.  She fed us a favorite quick Saturday supper - beans and hot dogs ;-)  We spent some time enjoying watching the hummigbirds coming to the front porch feeders.  A beautiful Baltimore Oriole also showed up!

I was admiring Sue's flower garden and asked if I could get some plantings to take home.  In minutes she had dug up purple cone flowers and some dark purple iris for each of us.  We packed up the car and headed on home.  Always a fun day with my sisters!  Now I'm off to plant those flowers before it rains again.

Check back again in a few weeks to see those flowers blooming and more on the Bunny quilt.

Saturday, May 14, 2011

A Trip To The Long Arm Quilter

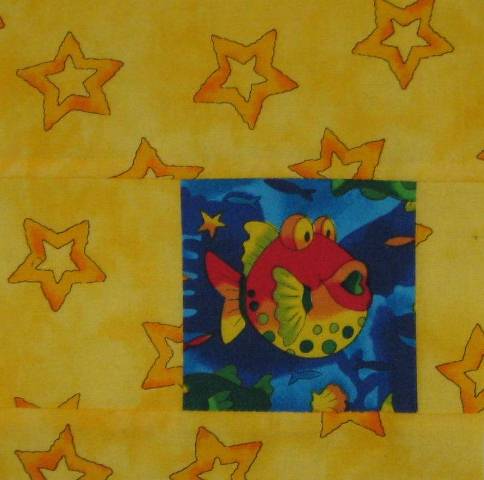
I just love this funky fish swimming
among the stars!
Managed to drop off the baby quilt at the quilters a couple of weeks ago and now it's ready for pickup!  This was my first time meeting Lorri and found out we have a lot in common - cats, computer work, project management, and of course QUILTING! 

While I was there I got a chance to see the quilting designs on the computer and, after seeing some samples, I picked the ones that worked for me.  Bubbles for the baby quilt and dragon flys for Betty's quilt.  Lorri helped me pick out the threads and I know they'll look great.  


I left the baby quilt but took Betty's, now officially nicknamed "Chippers", because I planned to use it for a special quilting "class" over the weekend.  More on that later . . .