

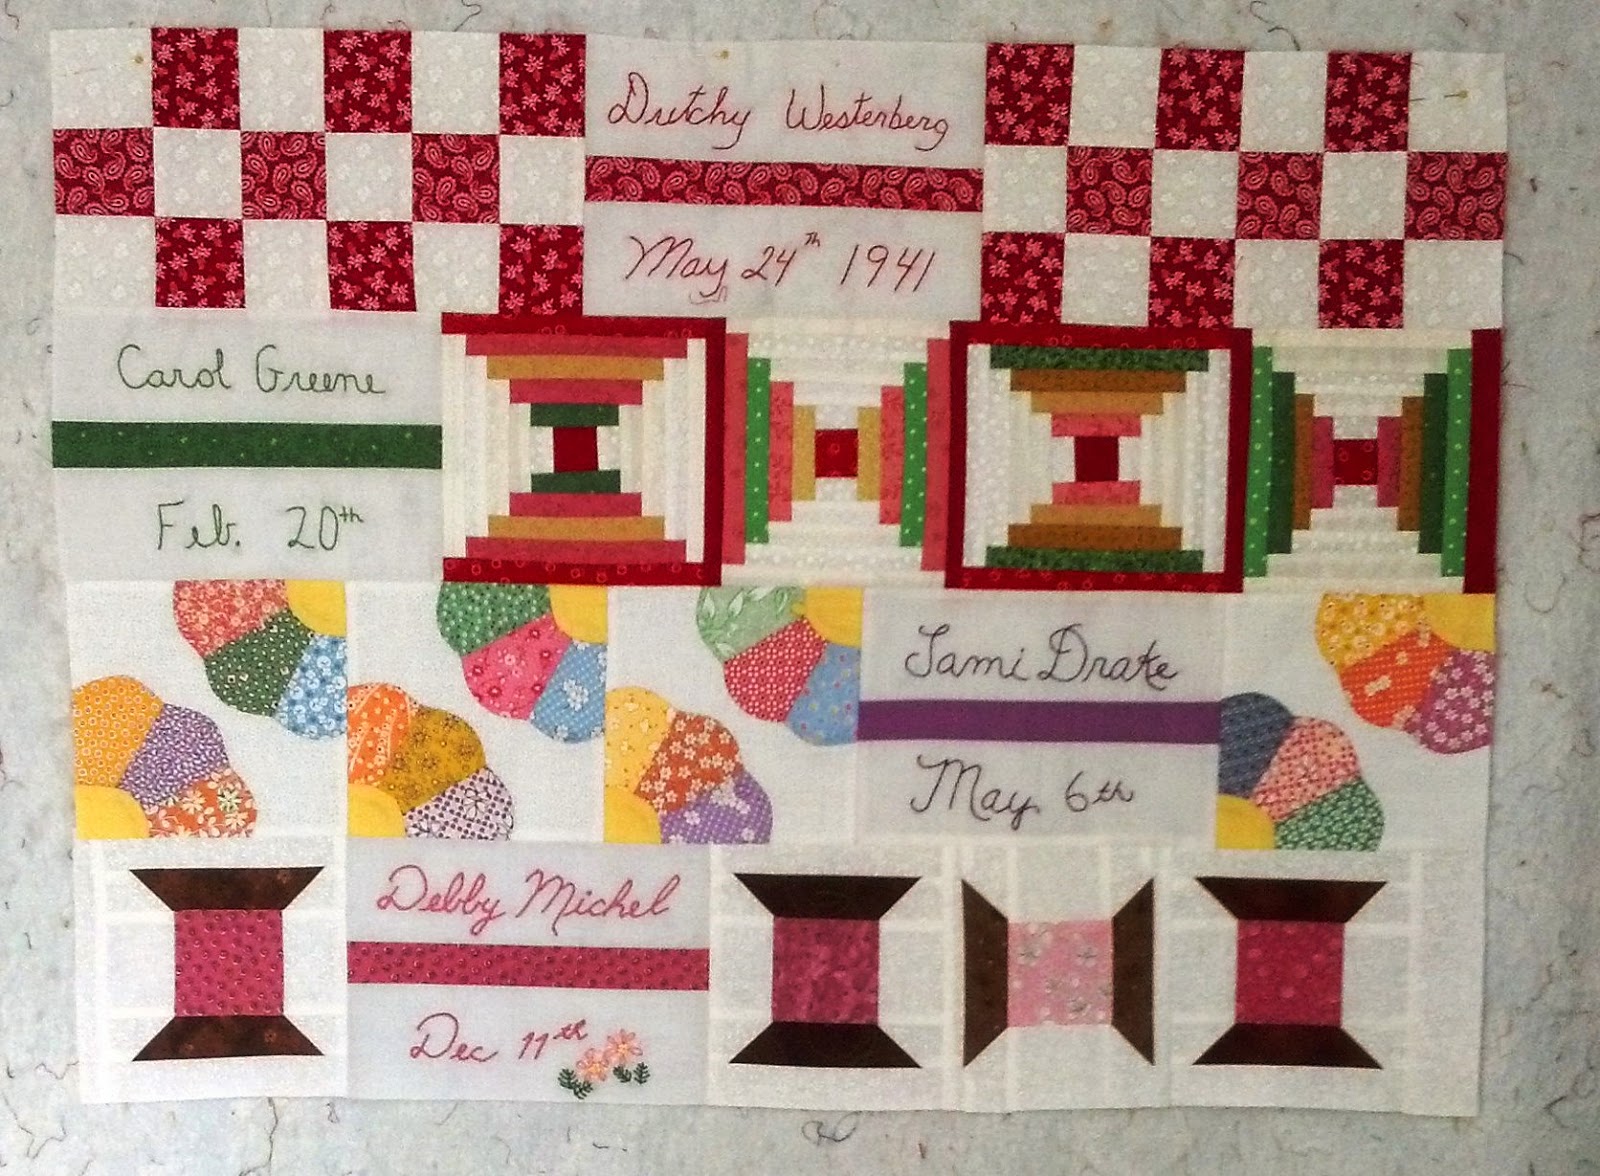
For her project Dutchy chose a signature block. Her instructions said we could create a row using any block we wanted that represented something about ourselves. In that row we were to add a signature block.
For her initial block she had done a beautiful job of embroidering her signature and birth date. She then combined it with red and white nine patch blocks. Here's a close up.

Here's what it looked like by the time I received it. Carol decided to leave off the year she was born and the rest of us followed suit. And in the end Dutchy removed her 'year' too.

Carol added the Court House Steps block with 1" strips (finished). I love the bold graphic look. Tami added the pretty hand applique fans in 1930s fabrics. Beautiful work done by both of them!
As the months go by in the Round Robin you can see that each time you get the next project bag there are more and more rows already in place. Figuring out how to coordinate with the graphic pattern done by Carol and the light colors in Tami's blocks is part of the fun of a group project like this.
Dutchy and I are sisters so there were many blocks that would have been appropriate to represent me to her. Since sewing is one of the many interests we have shared over the years I thought the Spool block would be the best choice. To create the spool block I started with several pretty pink fabric for the "thread" and a dark brown for the "spools".

Putting the block together proved to be more challenging than I expected. I didn't have a pattern so I just looked at some on the internet and improvised. Once I figured out the appropriate size I laid out all the pieces. I started with creating the angled edges of the spool.

A little chain stitching meant it went together quickly but I had to pay attention to the direction of each white rectangles to make sure the angle was opposite on each end. After they were all stitched I pressed them open, with the seam allowance pressed onto the dark fabric.

Here's a close up of all the parts of the block sewn together.

For the embroidery I used a stem stitch in #5 Perle Cotton. I like the texture of the Perle for an outline stitch. Its a bit thicker than regular cotton floss and stands up a bit higher on the project.

And a little trick my mother taught me is to lay a bath towel on the ironing board then put the piece face down on the towel and press from the back. I use plenty of starch to get a smooth surface which also makes the stitching stand out.
Here's how it looked when I passed it on to Jane.
You can clearly see the piecing of the white background on the spools but that blend in once the finished piece is quilted.
And here's Dutchy the finished project. It's the perfect size to fit on the rack she uses for wall hangings. I can't wait to see it all done and hanging up next spring!

No comments:
Post a Comment